Being able to make any image or link bring up the Olark chat box lets you highlight your live chat service anywhere on your site. As with all the examples below, we recommend choosing the “hidden by default” widget visibility option so that your chat box is hidden until someone clicks the link.
Note: You need to be on a paid account in order to enable the Hide the chatbox by default setting.
If you send a message to your visitor, either as an agent or using an automation, the chat box will automatically appear and expand itself.
This article contains four short guides with examples.
Click-to-Chat Link
This click-to-chat link makes use of the Olark Javascript API. You can modify or hide the link itself when your agents are away by using the api.chat.onOperatorsAway call.
- Copy the following HTML code:
<!-- BEGIN OLARK CHAT LINK -->
<a href="javascript:void(0);" onclick="olark('api.box.expand')">
    Click here to chat!</a>
<!-- END OLARK CHAT LINK -->
- Paste the code into your website source anywhere between the two
bodytags. - Save your page and reload.
It should look something like this:

Click-to-Chat Image
- Copy the following HTML code:
<!-- BEGIN OLARK CHAT IMAGE -->
<a href="javascript:void(0);" onclick="olark('api.box.expand')">
      <img src="https://static.olark.com/imageservice/library/thumbnails/simple/hummingbird-attention-woman-2.jpg.thumb-200-200.png">
    </a>
<!-- END OLARK CHAT IMAGE -->
- Note: You can find the Site ID for your account here.
- Place this code where you want your image to appear. The links to the images should be after
online=andoffline=in thesrcattribute. - Save your page and reload.
It should look something like this:

Note: If you’d like your images to display differently based on online/offline status, you can use the following code:
<!-- BEGIN OLARK CHAT IMAGE-->
<a href="javascript:void(0);" onclick="olark('api.box.expand')">
<img src="https://images-async.olark.com/status/YOUR_SITE_ID/image.png?online=https://static.olark.com/images/image-orangelark-available.png&offline=https://static.olark.com/images/image-orangelark-unavailable.png" border=0></a>
After you insert your Site ID where it shows YOUR_SITE_ID, you can reference the image file path after online=. You can use offline= for an offline image file.
Chat Side Tab
You can add a click-to-chat tab to the side of your page. Remember, you can use your own custom image or change the position by modifying this code.
- Copy the following HTML code:
<!-- BEGIN OLARK TAB-->
<div id="olark_tab">
    <a href="javascript:void(0);" onclick="olark('api.box.expand')">
        <img src="https://static.olark.com/images/livehelp-tab-icon.png" />
    </a>
</div>
<!-- END OLARK TAB-->
- Paste the code into your website source anywhere between the two
bodytags. - Include the following CSS either in your HTML document or your CSS stylesheet. If including in your CSS stylesheet, the
<style>and</style>tags are not needed:
<style>
  div#olark_tab{
    position: fixed;
    left: 0;
    bottom:0%;
    z-index:5000;
  }

  #olark_tab a {
    display:block;
    /*Edit these to change the look of your tab*/
    border: 3px solid white;
    border-left-style: none;
    border-bottom-style: none;
    margin-top:0px;
  }

  #olark_tab a:hover{
    border-color: orange;
  }
</style>
- Save your page and reload.
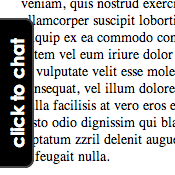
Chat Side Tab (CSS Only)
If you want to use a solution that does not require any images, you can use CSS to position a click-to-chat tab on the side of your page.
Note: This method uses CSS3 which may not work on older browsers.
- Copy the following HTML code:
<!-- BEGIN OLARK TAB-->
<div id="olark_tab">
    <div>
        <a href="javascript:void(0);" onclick="olark('api.box.expand')">
            Click to chat
        </a>
    </div>
</div>
<!-- END OLARK TAB-->
- Paste the code into your website source anywhere between the two
bodytags. - Include the following CSS either in your HTML document or your CSS stylesheet. If including in your CSS stylesheet, the
<style>and</style>tags are not needed:
<style>
  div#olark_tab{
    position: fixed;
    left: 0;
    bottom:40%;
    z-index:5000;
  }

  #olark_tab div{
    height: 150px;
    width: 150px;
    float: left;
    filter: progid:DXImageTransform.Microsoft.BasicImage(rotation=3);
    -webkit-transform: rotate(-90deg);
    -moz-transform: rotate(-90deg);
  }

  #olark_tab a{
    /*Edit these to change the look of your tab*/
    background-color: black;
    color: white;
    font: bold 18px "century gothic";
    height: 20px;
    padding: 6px;
    border: 2px solid #363636;
    display: block;
    text-decoration: none;
    text-align: center;
    width: auto;
    -webkit-border-bottom-right-radius:9px;
    -webkit-border-bottom-left-radius:9px;
    -moz-border-radius-bottomleft:9px;
    -moz-border-radius-bottomright:9px;
    border-top-style: none;
    border-top-width: 0;
  }

  #olark_tab a:hover{
    background-color: white;
    color: black;
  }
</style>
- Save your page and reload. It should look something like this example.