
Zapier integration guide
NOTE: This help article is intended for customers on our self-serve level of service. If you are an Olark Pro customer, your integration likely will work differently. Please reach out to pro@olark.com for help with setting up your integration.
With the Olark and Zapier integration, you can create a workflow called a “zap” that takes information from Olark and automatically transfers it to one of over 2,000 apps. A few examples:
- Archive Olark transcripts in Google Sheets
- Create or update ActiveCampaign contacts for new Olark messages
- Add tasks on Asana for new transcripts on Olark
This integration requires a Zapier account (the Basic plan is free).
Connection steps
To connect Olark to Zapier, start by creating a new Zapier account. Once you’re logged in, hover over the black plus sign on the left side bar and click on the Make a Zap button.
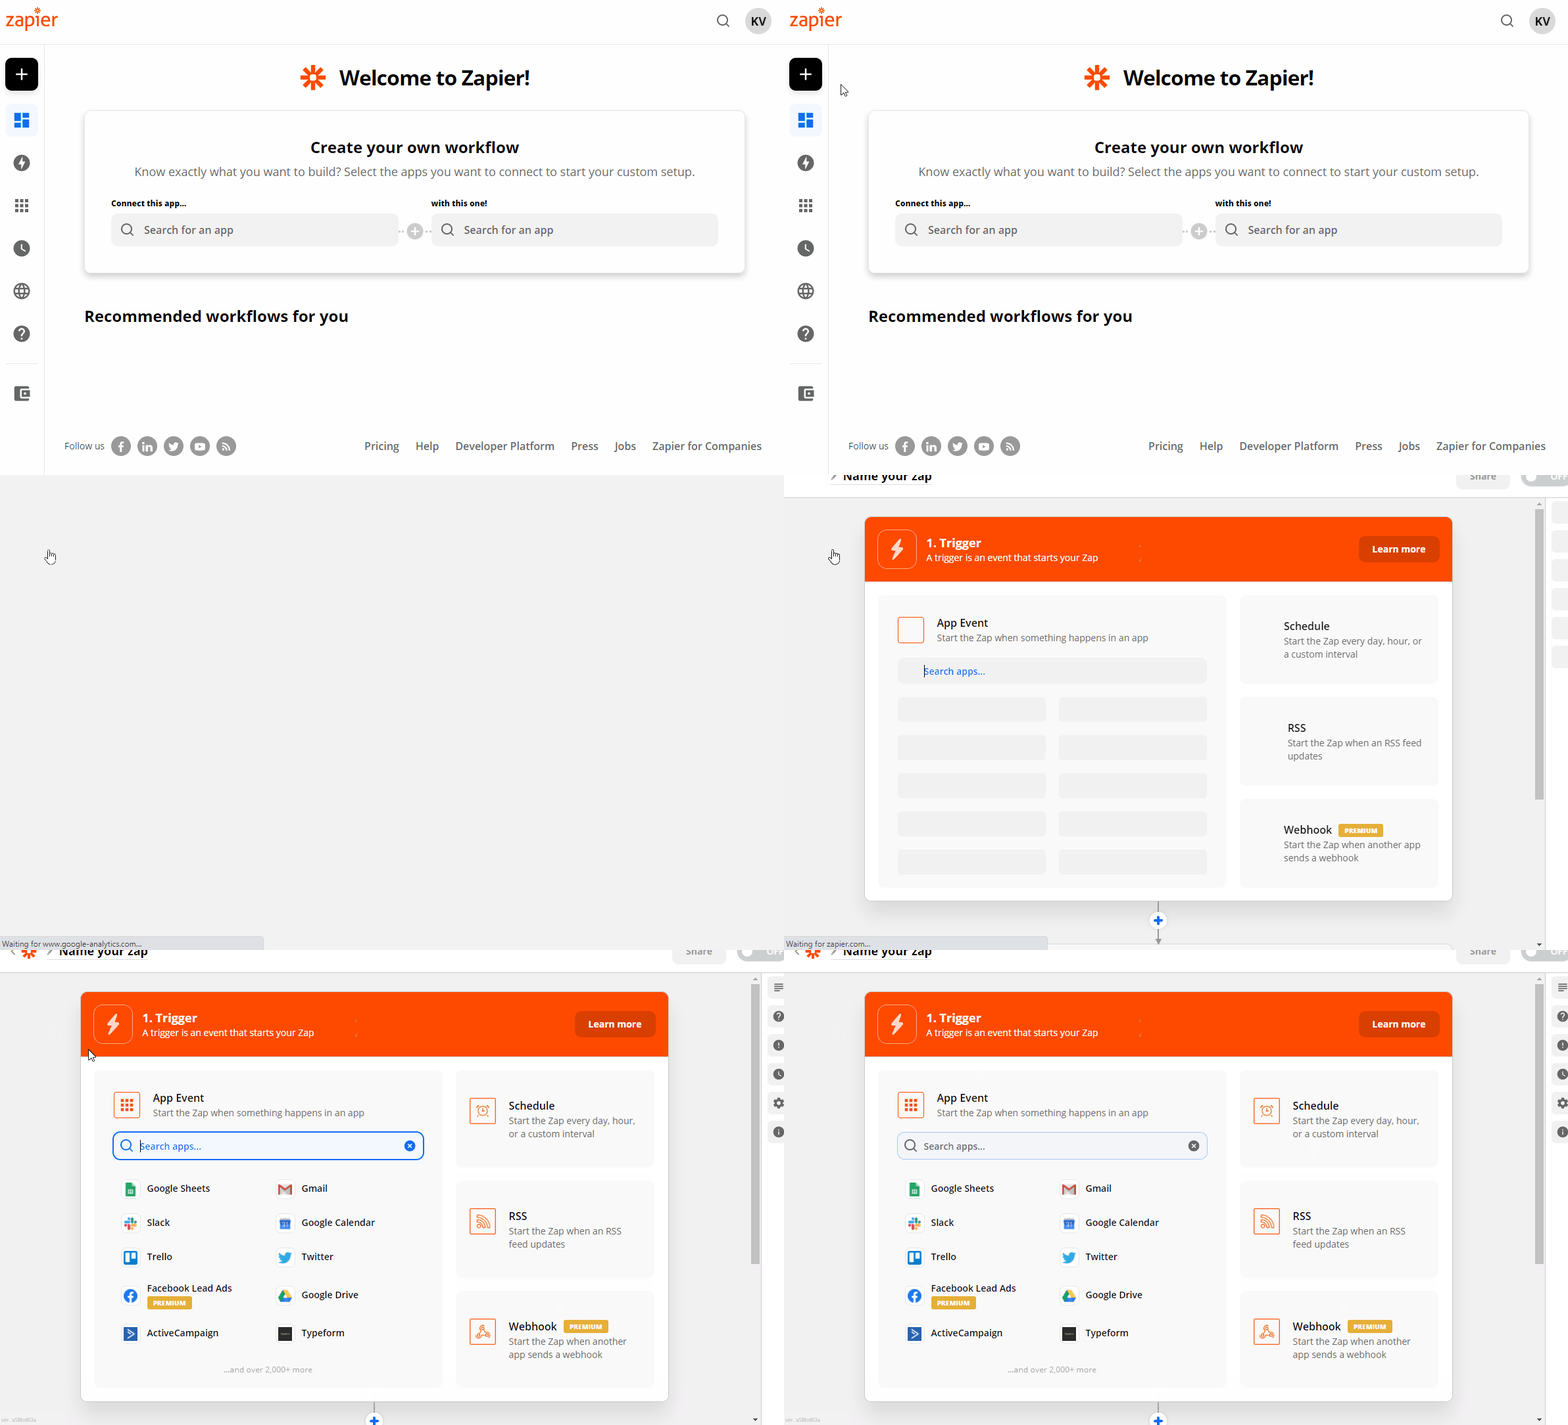
Choose Olark as the app. Then, select either New Message or New Transcript based on the data you want to use in your zap. Click Continue to set up a Webhook URL, and copy the URL.
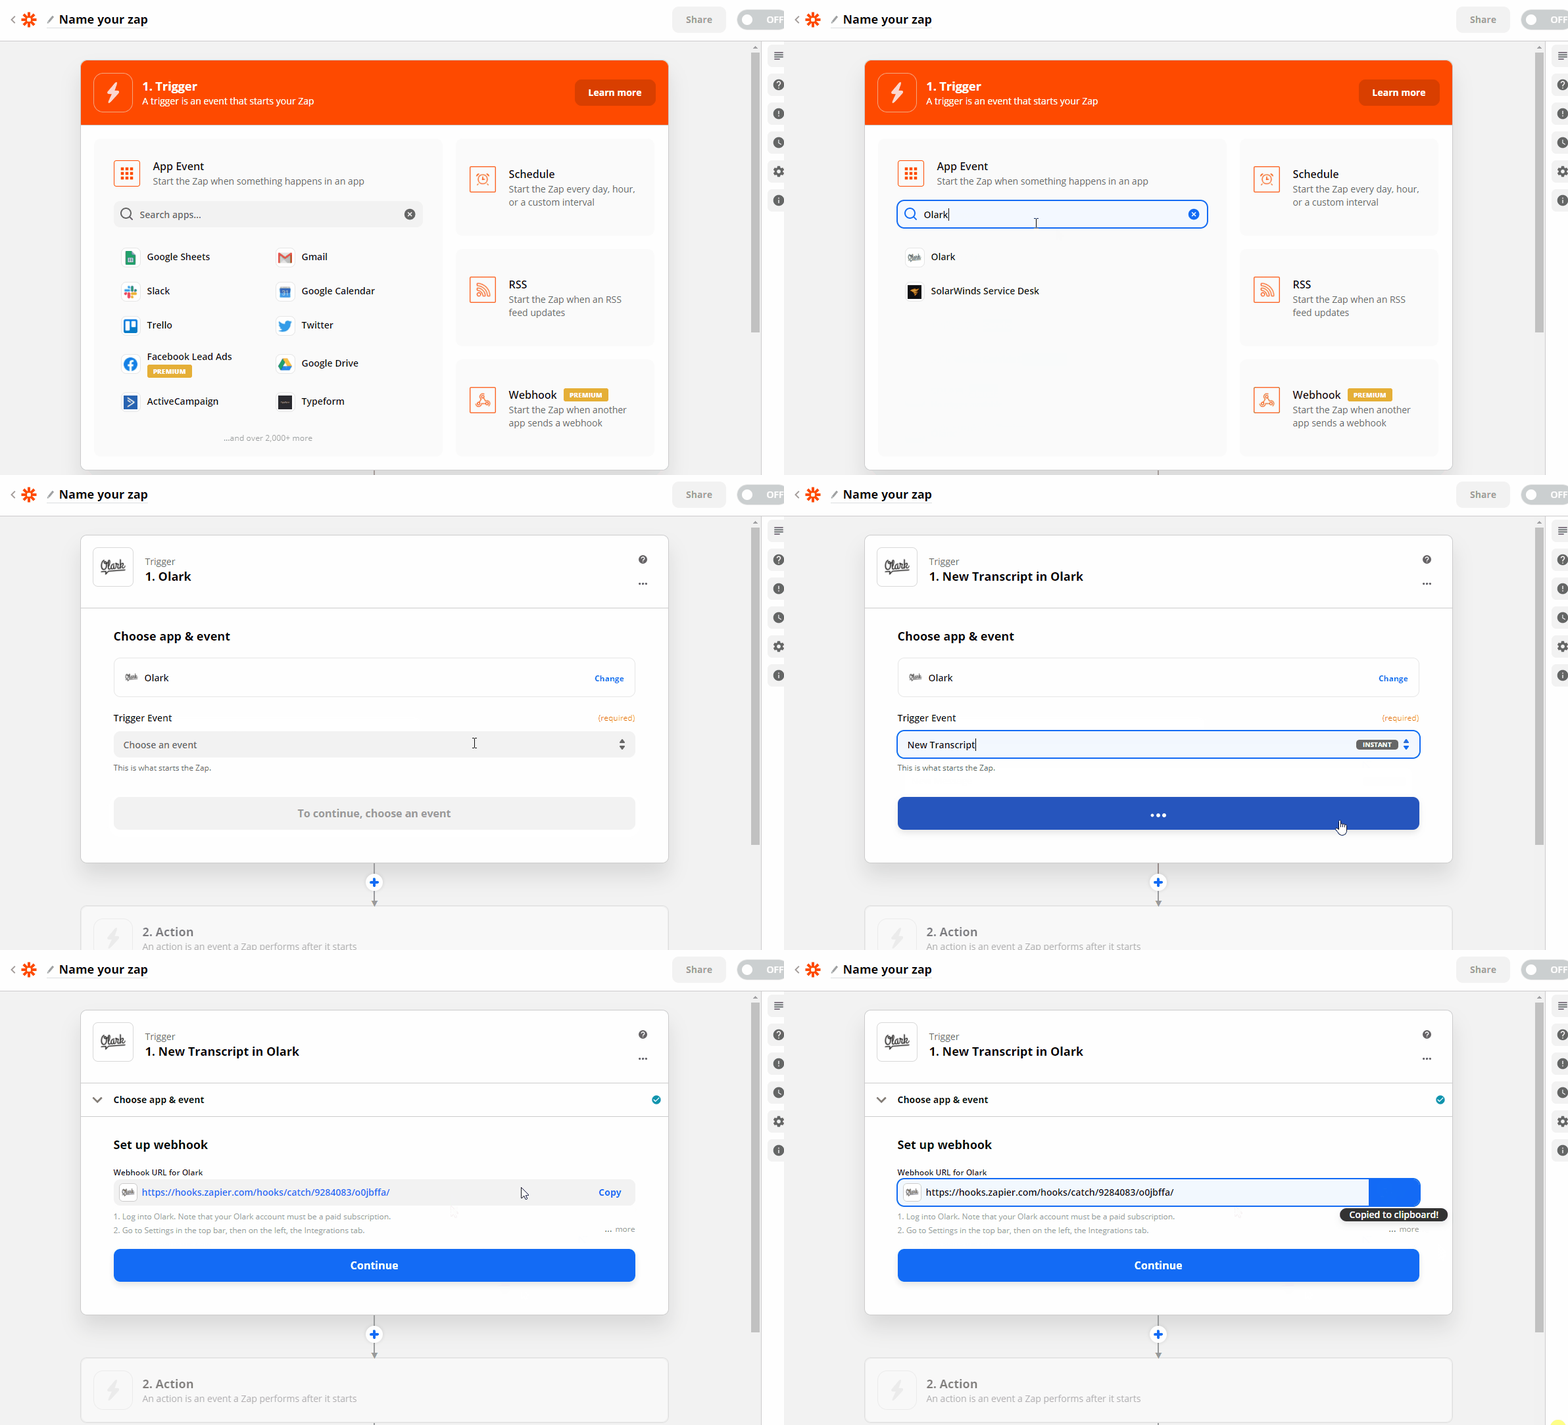
Next you’ll want to set up the Webhook. This is your connector.
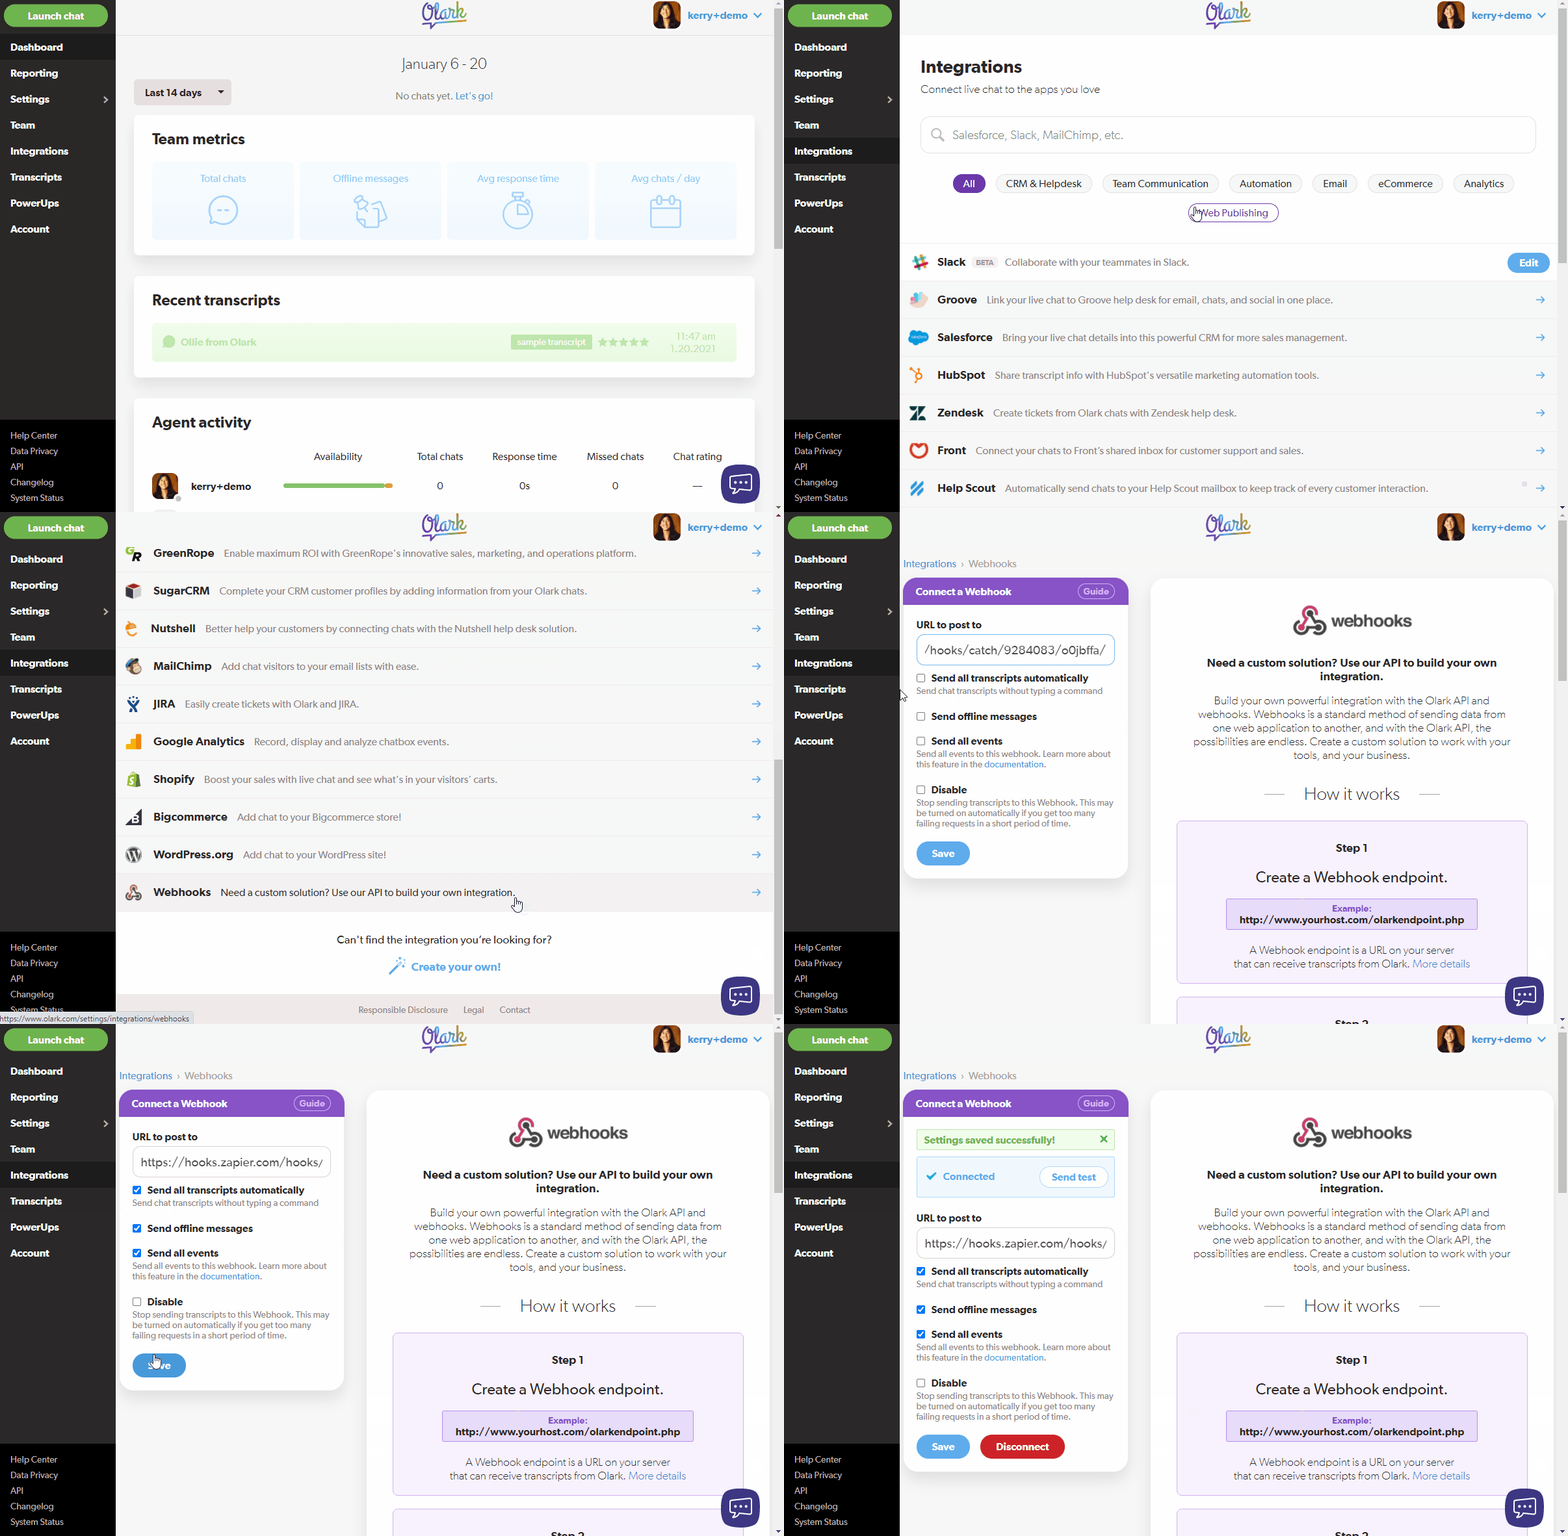
Then, log into your Olark account. (Note that your Olark account must be a paid subscription.) Then, select Integrations > Webhooks. Under Connect a Webhook, paste the Webhook URL into the URL to post to box.
Make sure the first three checkboxes are checked to send transcripts automatically, send offline messages and all events. Click Save.
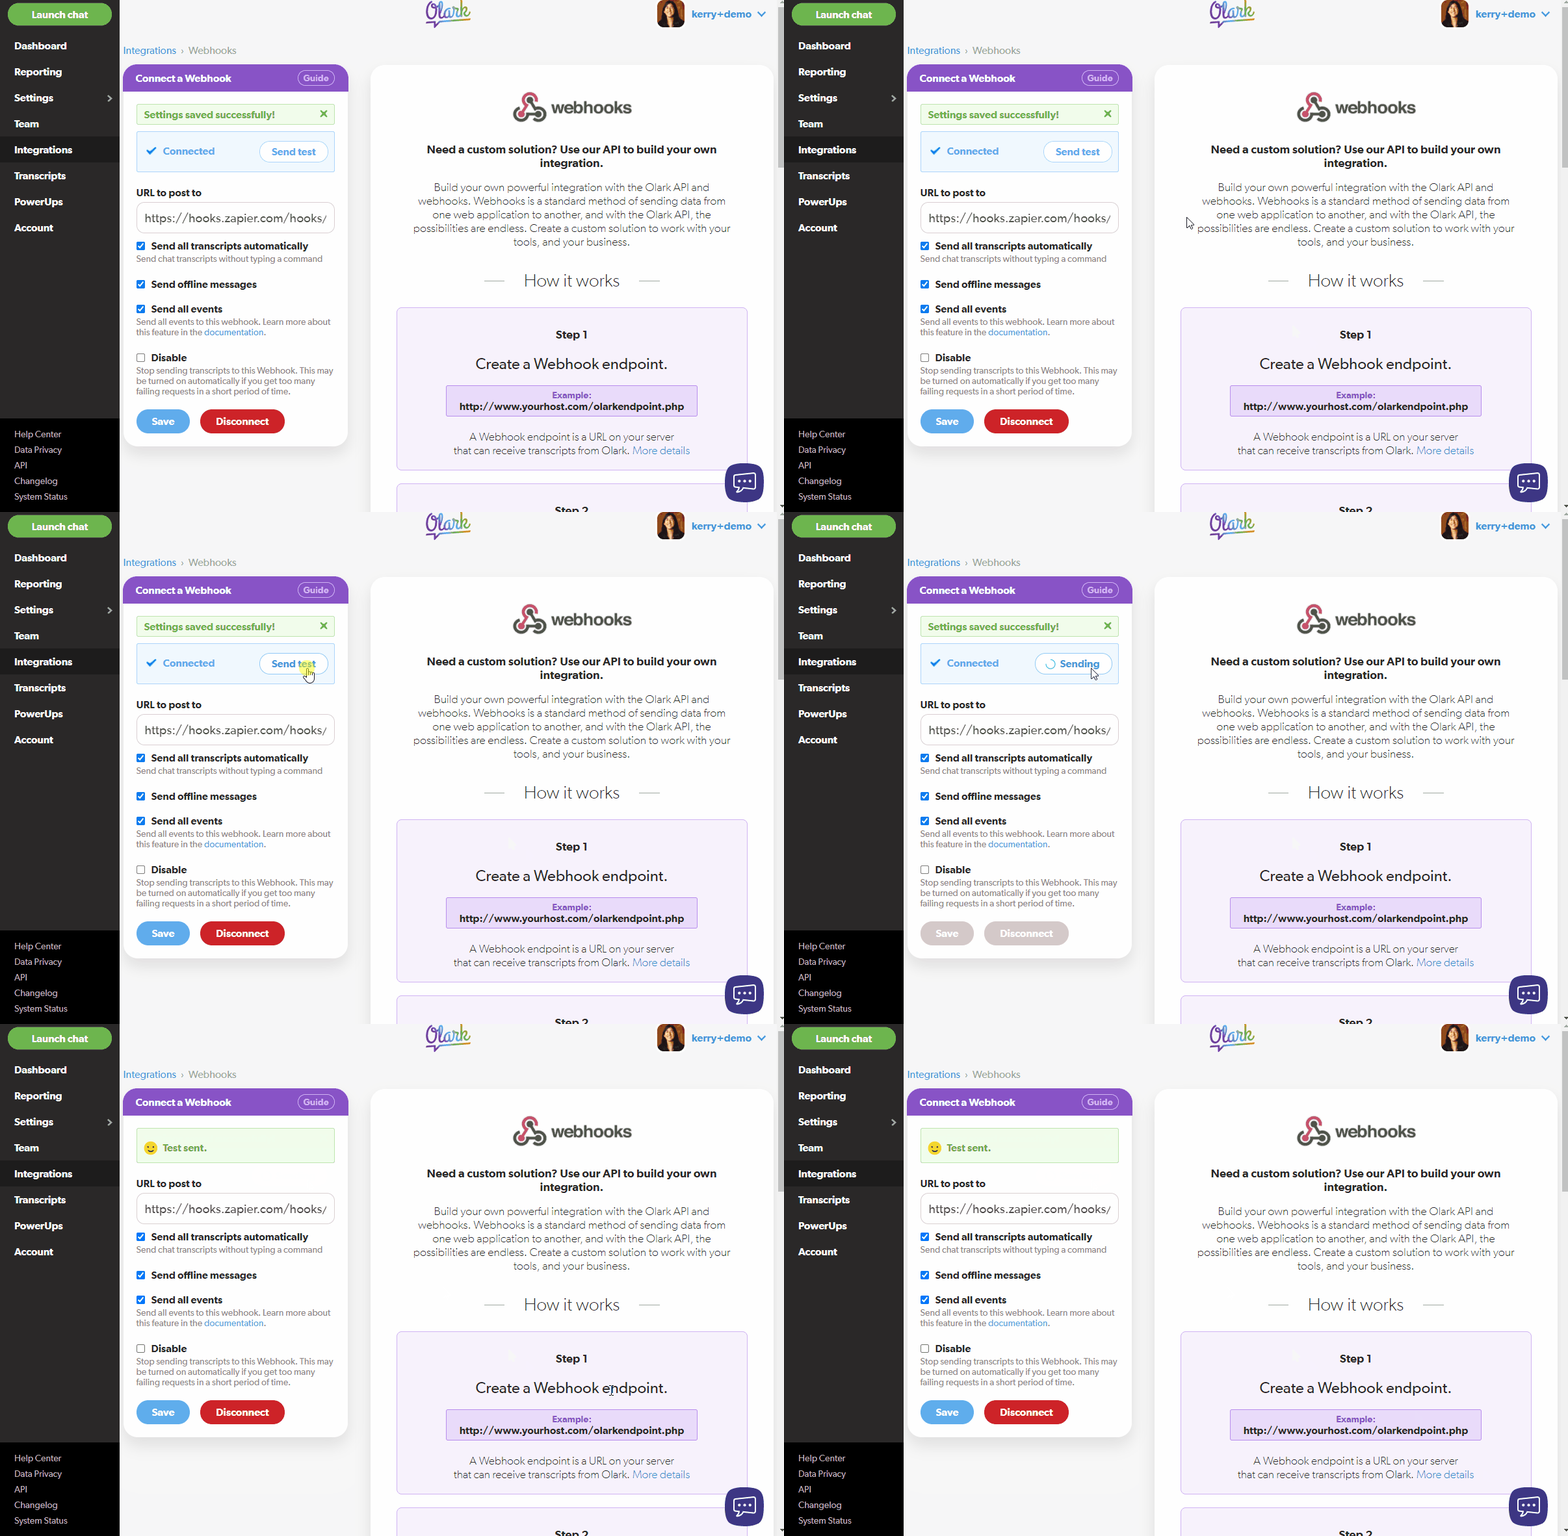
Click Send a Test in Olark.
Next, you’ll return to Zapier. Click the Test Trigger button to be sure your Webhook is set up correctly.
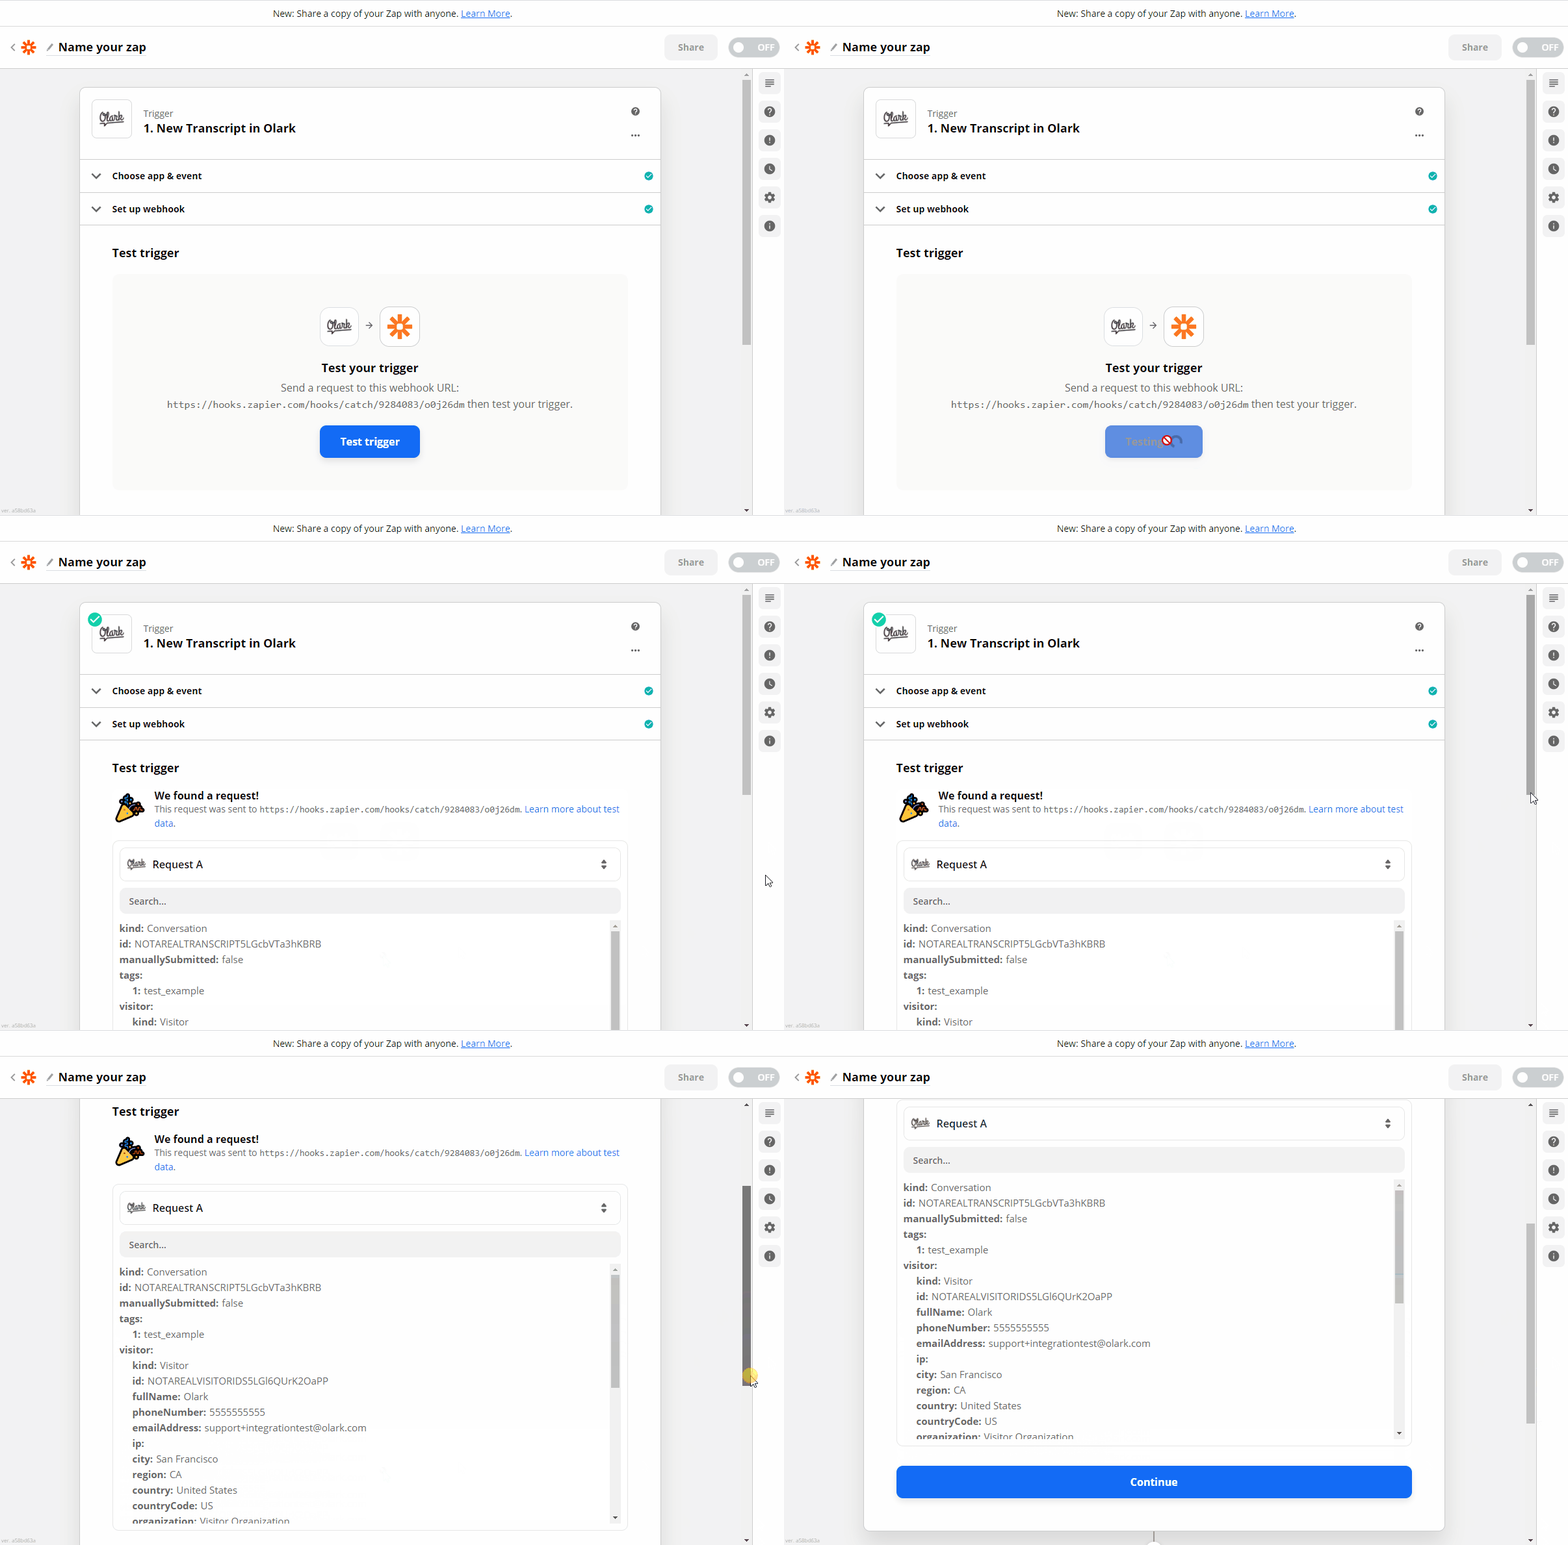
Then, select the App Event you want to happen when the Olark trigger happens. This could be anything of the apps available in a search, like Google Sheets or Asana. Select the desired app to connect, then the desired action to take (for example, Create Spreadsheet Row or Attach File). Sign into the desired account to sync.
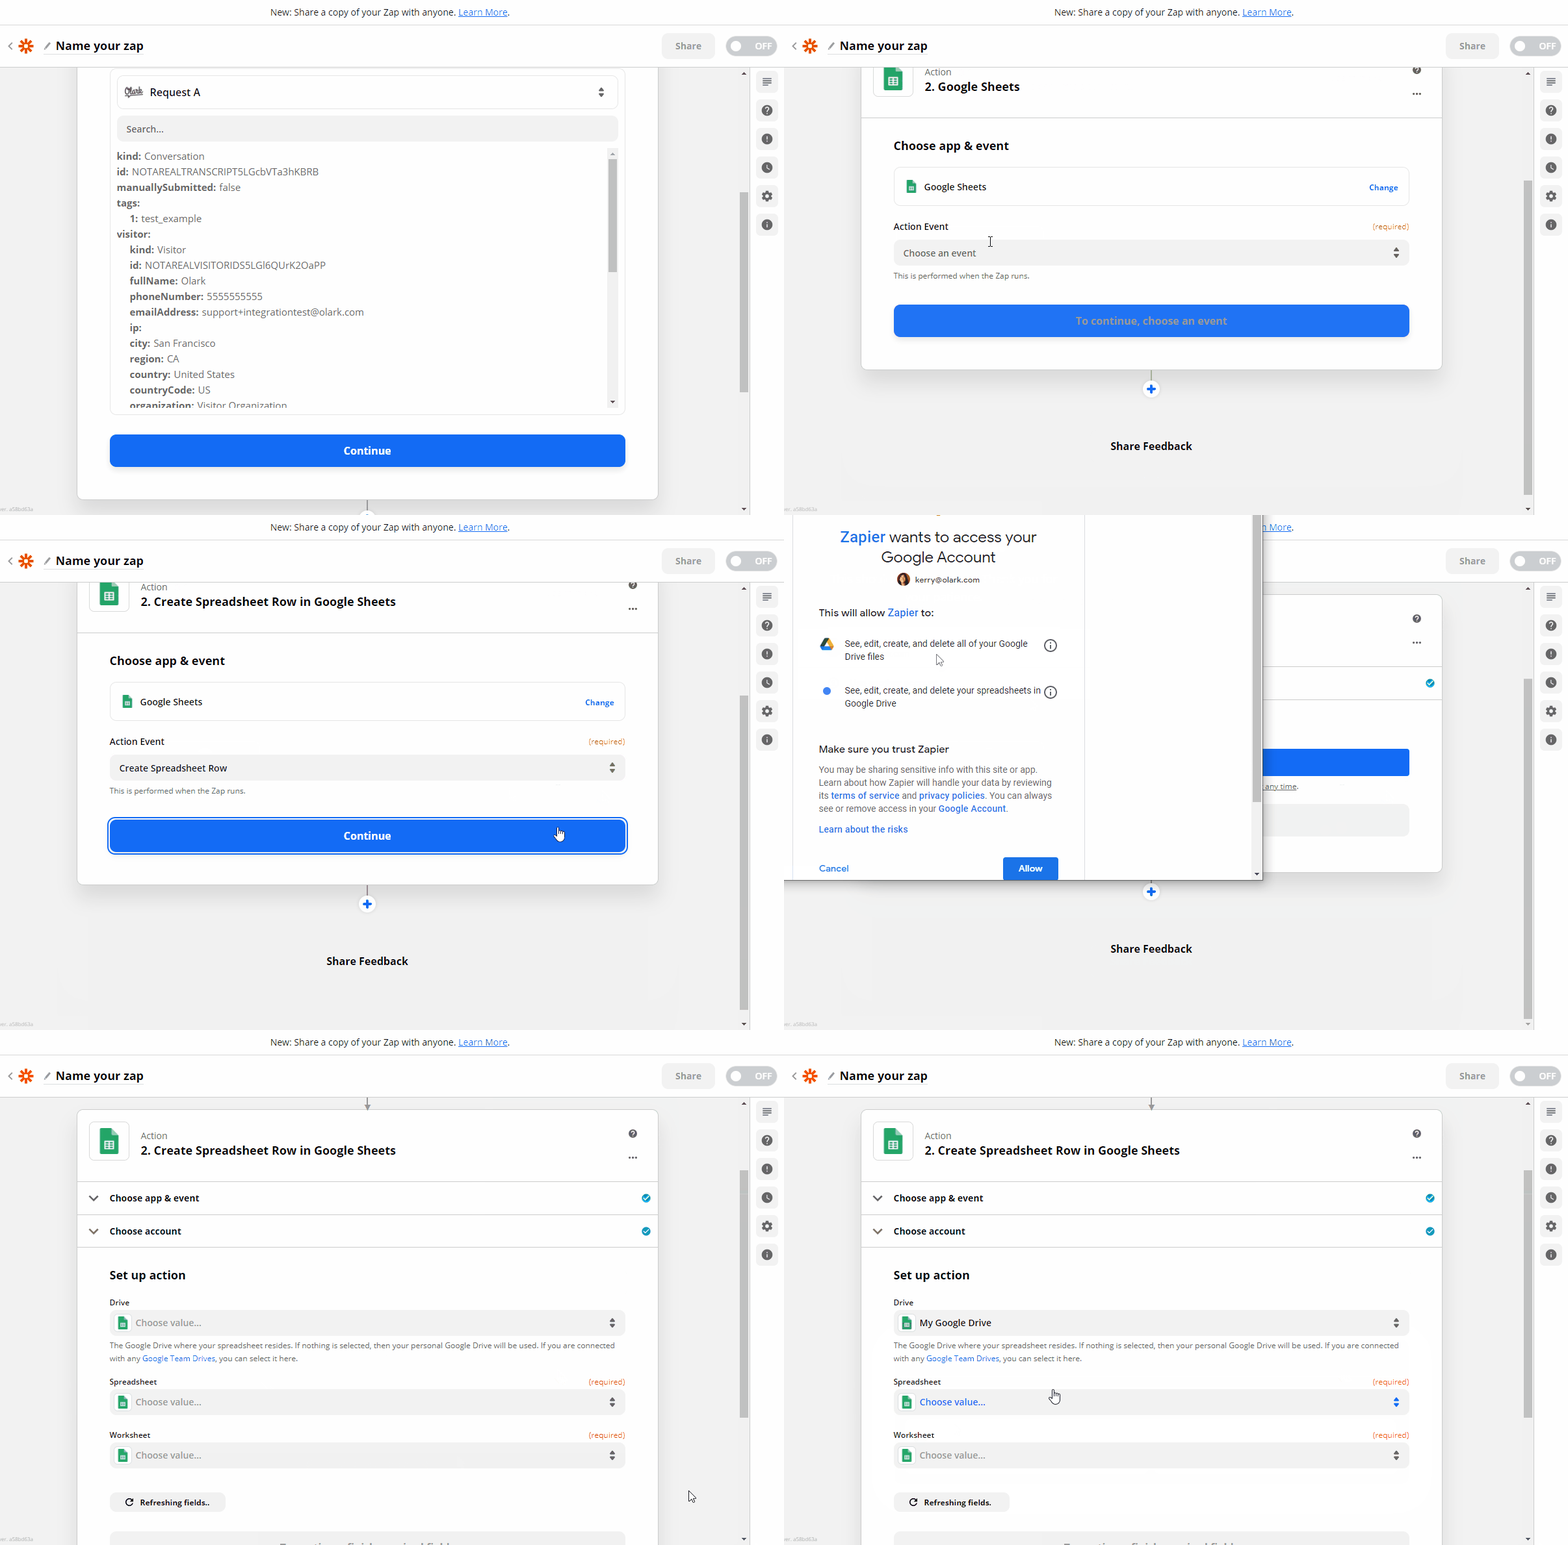
Then customize the information to sync. Click Continue.
Now, click Test & Continue. As long as everything is working, you can turn the zap on.
To do a live test, head to your website and start a test chat. Look into the account that you’ve connected to see if it’s updating the way you want it to.
Congratulations, you’ve just created a Zapier integration!
