
Prestashop integration guide
Following this guide will show you how to install Olark on Prestashop (versions 1.5 and above) and start chatting right away with your customers!
Installation steps
- Use your preferred FTP client, and log into the domain where you are hosting your Prestashop installation.
- Navigate to the root folder of your website (Usually WWW or public_html), and then navigate to Presto/Themes/X, where X is the name of your active theme.
- Select the footer.tpl file in the theme folder. Download the footer.tpl file to your computer and open it in a text editor of your choice. Then, change the name of the the file on your webserver to footer.bak, in case any errors are introduced when you make your edits.
- With the footer.tpl file open, copy your Olark install code here and paste it in the file, just above the </body> tag.
- Log in to copy your Olark embed code.
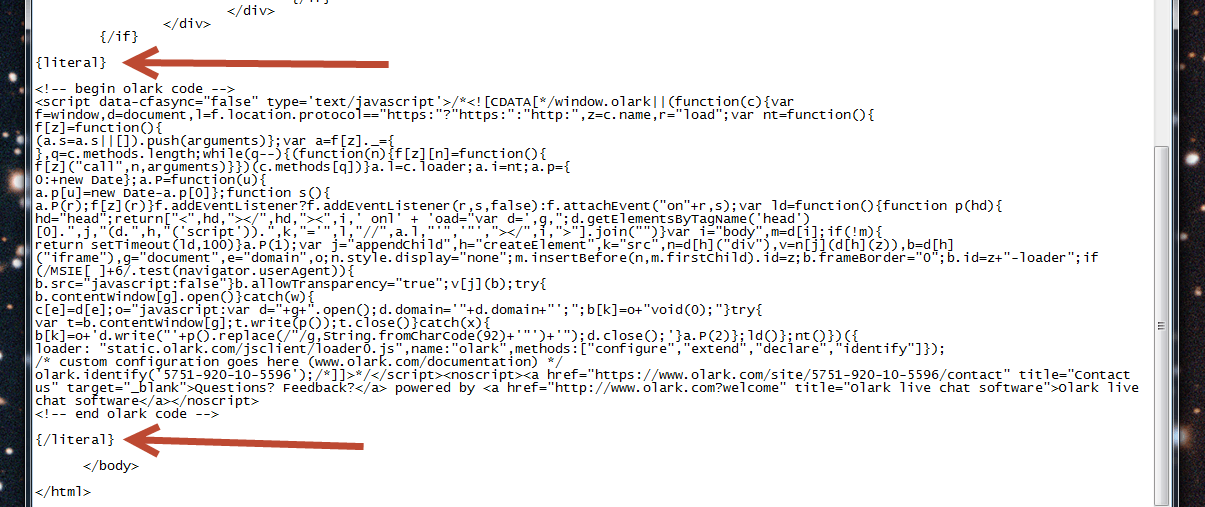
- With the file still open, insert a {literal} tag above the body of the Olark code, and a {/literal} below the body of the Olark code, as detailed in the image below.
- Save the changes to the footer.tpl file, and upload the altered file back to your web server via your FTP client. If the FTP client prompts you to choose an action because the file already exists, pick the overwrite option.
TIP: If you don't see Olark appear on your page (especially if you view the source of your page in the web browser and don't see Olark), check to make sure your page isn't cached. Here's a helpful article for solving this if you happen to use Smarty Cache: http://www.templatemonster.com/help/prestashop-1-6-x-how-to-clear-smarty-cache.html.
Nice work, you are all set!
Oops! Something went wrong while submitting the form.