
WHMCS integration guide
WHMCS is an all-in-one CMS/CRM system that helps you sell to and track your online customers. Follow this guide to quickly install Olark on WHMCS.
Installation steps
- Connect to your webserver via the FTP program of your choice, and navigate to whmcs/template/X, where X is the name of the theme that you are using in WHMCS.
- Download the footer.tpl file from your webserver to your local computer. While still connected via FTP, rename the footer.tpl file to "footer.bak", in case you introduce an error in the footer file when you re-upload it.
- On your local computer, open up the footer.tpl file that you have downloaded inside, of a text editor of your choice.
- Log in to Olark and visit settings > Chat Widget to copy your Olark code snippet.
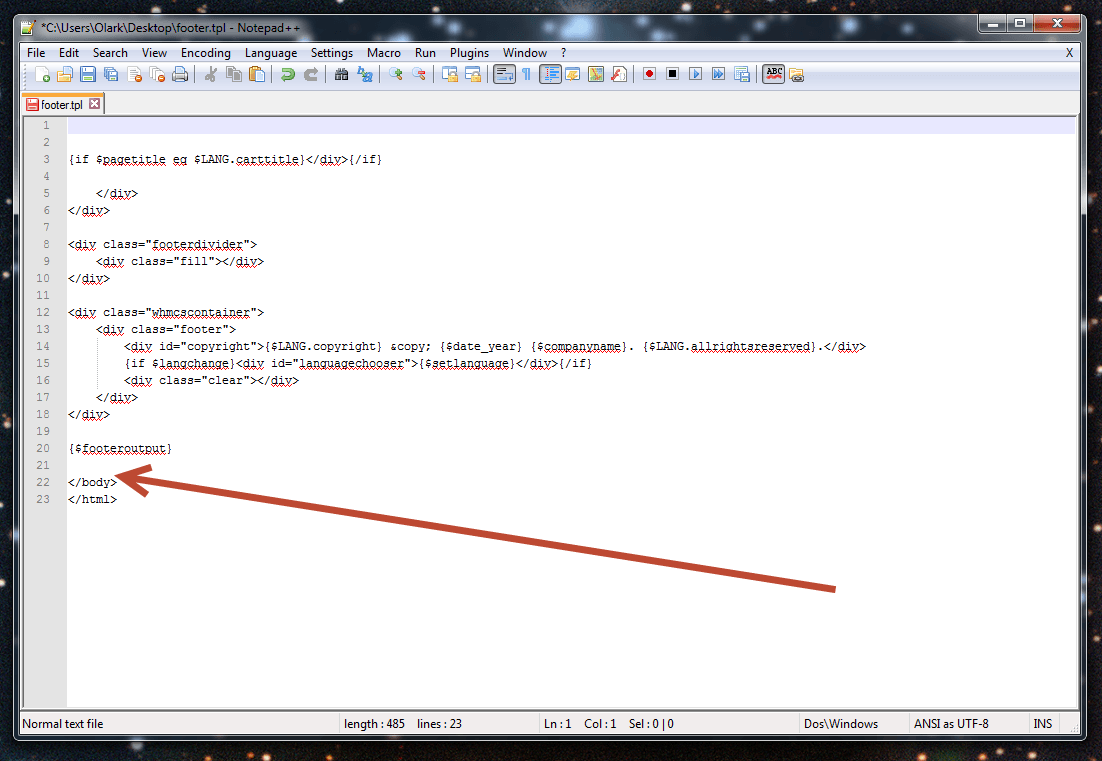
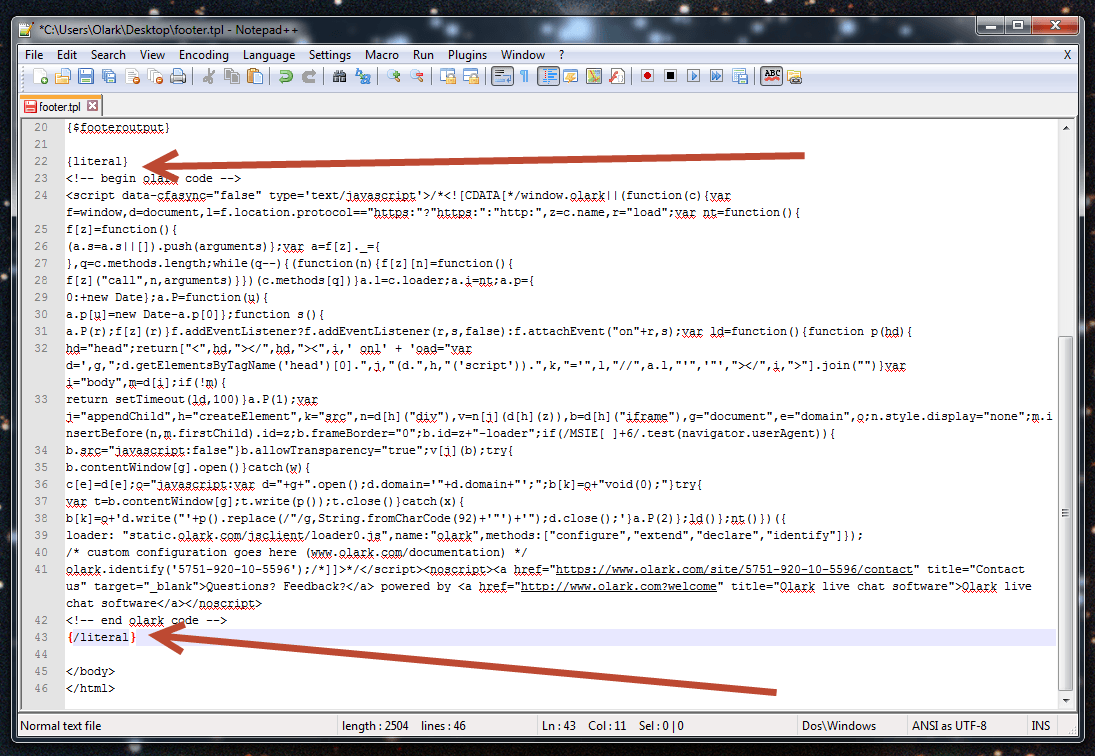
- Above the </body> tag in the footer.tpl file, paste in the Olark install code.
- Now, insert a {literal} tag above the Olark code, and add a {/literal} below the Olark code.
- Save the footer.tpl file and re-upload it back to where you downloaded it from on your webserver.
- Check your WHMCS pages and you should be all set!
Oops! Something went wrong while submitting the form.